
How to Remove a Lawn Mower Blade in 10 Easy Steps
To remove your lawn mower blade safely, start by clearing your workspace and putting on gloves and safety glasses. This will protect you from any sharp edges or debris.
Next, turn off the mower and disconnect the spark plug or battery to prevent accidental starts.
Make sure to drain or siphon the fuel before proceeding.
Position the mower on its side with the air filter facing up—this helps prevent oil or gas from leaking.
Now, secure the blade by wedging a block of wood or clamping it firmly in place.
Carefully loosen and remove the blade bolt using the appropriate tools.
Once the blade is off, inspect it for any damage and clean it thoroughly.
You can then decide whether to replace or sharpen the blade.
Following these steps will protect both you and your mower. Keep going to discover more helpful tips on blade maintenance and how to reinstall it properly!
Prepare Your Workspace and Safety Gear
Before you start removing the lawn mower blade, make sure you clear your workspace of any obstacles and set up good lighting to work safely and see clearly. This helps prevent accidents and lets you focus on the task.
Next, grab a pair of heavy-duty work gloves to protect your hands from sharp blade edges while handling and removing the blade. Consult your mower’s owner’s manual to identify the correct tools needed, usually a socket wrench and possibly a blade removal tool or block of wood.
Place your mower on a flat, stable surface and ensure it’s completely cool before beginning. Wearing safety glasses is also a smart move to shield your eyes from any debris.
These steps prepare you well for safe and effective blade removal. It’s all about being safe and ready before you dive in!
Turn Off and Disconnect the Lawn Mower
How do you guarantee your safety when starting to remove the lawn mower blade? The first step is to turn off and disconnect your mower completely to avoid accidental starts.
Follow these essential steps: Turn off the engine and make sure it’s fully cooled. Then, disconnect the spark plug wire to cut power to the engine.
Turn off the engine, let it cool, and disconnect the spark plug wire to ensure safety.
For battery-powered mowers, remove the batteries entirely. And if you have a gas mower, remove the spark plug and lay the mower on its side with the air filter up.
Make sure no fuel or oil spills by positioning the mower correctly before working. This way, you keep everything safe and clean while you work on your mower.
Drain or Remove Fuel From the Mower
Since fuel can pose a fire hazard, you’ll want to drain or remove it carefully before working on your mower.
First, disconnect the spark plug wire and remove the fuel cap. Then, either run the mower until the tank is nearly empty or use a siphon pump to drain the fuel into an approved container.
Always work in a well-ventilated area away from open flames.
| Step | Action |
|---|---|
| 1. Safety Precautions | Disconnect spark plug, remove fuel cap |
| 2. Draining Fuel | Use siphon pump or run mower dry |
| 3. Fuel Storage | Store fuel in labeled, approved container |
Be sure to wipe up any spills to prevent accidents before you move on. It’s a simple step but really important for safety.
Position the Mower for Blade Access
To access the blade safely, position your mower on a flat, stable surface and turn off the engine. Before tipping the mower on its side, take these steps to prepare:
- Disconnect the spark plug wire or remove the battery to prevent accidental starts.
- Remove the fuel tank cap and drain or siphon fuel to avoid spills.
Carefully tilt the mower on its side with the air filter facing upward to prevent oil leaks and debris entry. Place a block of wood or use a clamp to secure the mower and stop it from moving.
Make sure the mower stays stable throughout the process. This will protect you and the lawn mower blade.
Following these steps helps you safely position your mower for easy blade removal. Easy, right? Just take it step by step.
Secure the Blade to Prevent Movement
Before loosening the blade bolt, you’ll want to secure the blade firmly to prevent it from turning. To do this, lodge a sturdy 2×4-inch block between the lawn mower’s cutting edge and the deck. This simple step keeps the blade immobilized, making the removal process safer and easier.
Alternatively, you can clamp a C-clamp onto the blade or deck to hold it securely in place. Always wear heavy-duty gloves while handling the blade to protect your hands from the sharp cutting edge.
Once the blade is firmly secured and won’t move, you’re set to proceed with loosening the bolt confidently. Taking these precautions ensures you stay safe and prevents damage to the lawn mower’s parts during blade removal.
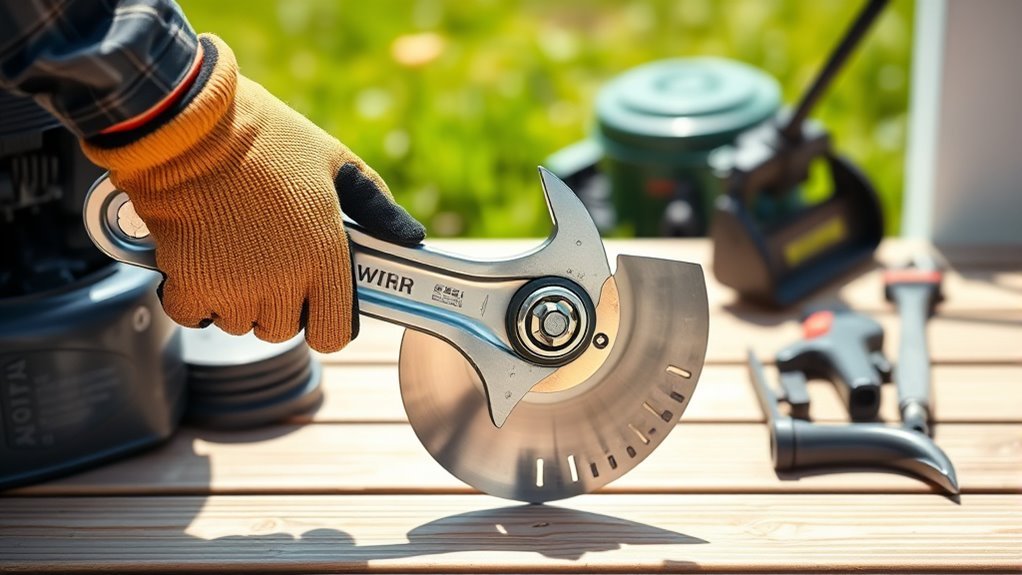
Loosen and Remove the Blade Bolt
To loosen and remove the blade bolt, you’ll need the right tools, like a socket wrench or torque wrench, to apply the correct force. Using a torque wrench helps you meet the manufacturer’s specifications and prevents damage.
Make sure the blade is secured before you start turning the bolt to keep it from slipping. That way, you’ll stay safe and avoid any accidents while working.
Choosing Proper Tools
Although removing a lawn mower blade might seem straightforward, choosing the proper tools is essential for a safe and efficient job. Using the right equipment, like a socket wrench or blade removal tool, ensures you can loosen and remove the blade bolt without damage or injury.
Keep these tips in mind:
- Use a socket wrench or adjustable wrench that fits the bolt size perfectly. Identify if your blade has a single bolt or multiple fasteners to select the correct tools.
- Secure the blade with a block of wood or blade removal tool to prevent spinning. Apply penetrating oil on stubborn bolts and wait a few minutes before loosening.
- Avoid pliers or makeshift tools to prevent slipping or stripping the bolt.
Choosing proper tools makes blade removal safer and quicker. It really helps make the whole process smoother and less stressful!
Applying Correct Torque
When you apply the correct torque to loosen or tighten the lawn mower blade bolt, you guarantee both safety and proper blade function. First, always wear gloves and secure the blade with a block of wood or a blade removal tool to prevent injury.
Use a torque wrench to loosen or tighten the blade bolt, ensuring you follow the manufacturer’s specified torque setting found in your mower’s owner manual. Turn the wrench slowly and steadily to avoid over-tightening or stripping the bolt threads.
After tightening, double-check the torque to confirm the bolt is securely fastened. Proper use of a torque wrench not only protects your equipment but also ensures safe mowing performance every time you work on your lawn mower blade.
Carefully Remove the Lawn Mower Blade
Before you remove the blade, make sure you’re wearing heavy work gloves to protect your hands from sharp edges. Secure the blade using a wooden block or a removal tool to keep it from spinning as you work.
Once the bolt is loose, carefully lift the blade off. Keep track of its orientation so you can reinstall it correctly later.
Safety Precautions First
Since working with sharp lawn mower blades can be dangerous, you should always disconnect the power source—like removing the spark plug or batteries—before you start. Taking proper safety precautions helps prevent injury and guarantee a smooth blade removal process.
Remember to wear gloves to protect your hands from sharp edges. Follow these essential steps:
- Disconnect the spark plug or remove batteries to cut power.
- Wear heavy-duty gloves for hand protection.
- Place the mower on a flat, stable surface and secure it.
- Use a block of wood or blade removal tool to stop blade rotation.
- Double-check the mower is off and can’t start accidentally.
Blade Removal Techniques
Although removing a lawn mower blade requires caution, you can do it safely by securing the blade with a block of wood or a C-clamp to prevent it from turning while you loosen the bolt.
Before you start blade removal, wear heavy-duty gloves to protect your hands from sharp edges.
Use the correct size socket or wrench to loosen and remove the bolt holding the blade to the spindle.
Take note of the blade’s orientation and any washers so you can reinstall it accurately.
Once the bolt is off, carefully lift the blade away from the mower with control and caution.
Inspect the Blade for Damage or Wear
When you inspect the lawn mower blade, pay close attention to any bending, cracks, or corrosion that could impact safety and performance. A damaged blade can compromise the mower’s efficiency, much like a clogged air filter or a fouled spark plug affects your engine.
Check these key points: look for visible bends, cracks, or rust on the blade surface. Also, examine the cutting edge for dullness, nicks, or chips.
Identify uneven wear or thinning by comparing thickness to specs. Don’t forget to inspect mounting holes for damage or looseness.
Make sure the blade attaches securely without wobbling. A thorough inspection helps you decide if the blade needs replacement before your next mowing session.
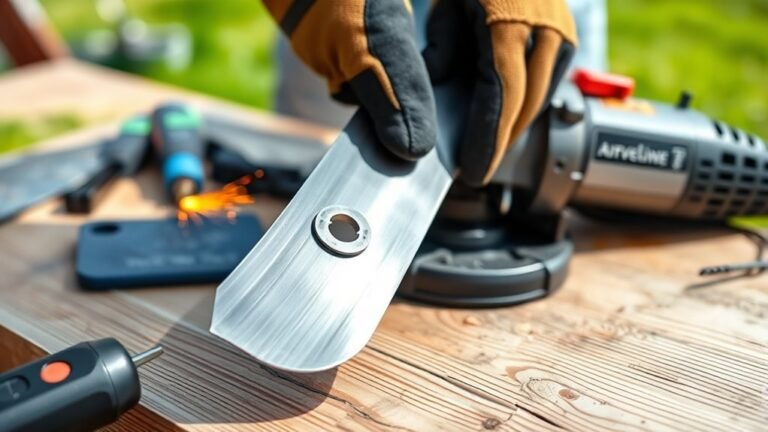
Clean and Sharpen or Replace the Blade
Before you sharpen or replace the blade, make sure to clean it thoroughly with a wire brush or rag to remove all grass, dirt, and rust. This guarantees better sharpening and helps you inspect the lawn mower blade properly.
If the blade isn’t severely damaged, use a metal file, bench grinder, or a Dremel rotary tool with a sharpener attachment to evenly sharpen the edges. Take a photo of the blade assembly before sharpening to keep track of its correct orientation.
If the blade is heavily worn, consider getting it professionally sharpened or replaced. After sharpening, check that the sharpened blade is balanced to avoid vibrations that could damage your mower.
Proper cleaning and sharpening extend the blade’s lifespan and improve cutting performance. So, taking the time to do this right really pays off!
Reinstall and Secure the Blade Properly
Before you secure the blade, make sure it’s oriented correctly with the cutting edges facing the mower’s rotation direction. Place the washers properly and tighten the bolts using a torque wrench to the manufacturer’s specifications.
Double-check all fasteners to guarantee the blade stays firmly in place during use. It’s really important to keep everything tight and secure for safe mowing.
Blade Orientation Check
Since the blade’s orientation directly affects cutting efficiency, you’ll want to reinstall it exactly as it was positioned originally.
Before you remove the blade, note its orientation carefully. When reinstalling, follow these key points:
- Verify the cutting edges face the mower’s rotation direction for best cutting.
- Check for any markings like “bottom” or part numbers; these should face downward.
- Place washers with the concave side toward the blade to keep a secure fit.
- Align the blade properly with the mower deck to avoid imbalance.
- Double-check that the blade is firmly fastened before starting the mower.
Paying attention to blade orientation when you remove the blade and put it back ensures your mower cuts smoothly and safely every time.
Bolt Tightening Technique
When you reinstall the blade, make sure to tighten the bolt to the manufacturer’s recommended torque using a torque wrench. This helps you avoid damaging the threads or letting the blade loosen during operation.
Proper bolt tightening is really important for safety and to keep your mower deck running smoothly. If your blade has multiple bolts, tighten them in a crisscross pattern. This way, the pressure is distributed evenly and you prevent warping.
Always double-check the blade’s alignment before tightening to avoid any imbalance. After running the mower for a few minutes, take a moment to inspect the bolt again and make sure it’s still secure.
Using a torque wrench means you apply just the right amount of force. This stops you from over-tightening or under-tightening.
Conclusion
Now that you’ve mastered removing your lawn mower blade, you’re basically a lawn care superhero! No more scary blades or mysterious noises—just smooth, confident fixes every time.
With these simple steps, you’re not just maintaining a mower; you’re taming a wild beast, turning chaos into calm, and making your yard the envy of the neighborhood.
So go ahead, tackle that blade like a pro and watch your lawn thank you endlessly! Removing a lawn mower blade might seem tricky at first, but with the right tools and know-how, it’s easier than you think. This skill will help you keep your mower running efficiently, ensuring a clean, healthy cut every time. Plus, regular blade removal and maintenance can extend the life of your lawn mower, saving you money in the long run. Ready to become the ultimate lawn care expert? Just follow these easy steps and enjoy a beautifully manicured yard all season long!